Generosity and Divorce are themes as we Read the Bible this year

Reading the Bible in 1 Year: History of the Children of Israel

The Nation of Israel - Reading the Bible in 1 Year

Showing posts with label #Homemade. Show all posts

Sunday, July 3, 2022

Lars Builds a Fence with Double Gates


Lars and Jacob rebuilt our run-down fence. It had been in place for over 30 years and some of the posts were rotten. I was afraid the dogs would be able to push the fence over if they tried hard enough. 

Anyway, if you're interested in do-it-yourself projects or woodworking, you might find this video, down below, interesting. And, if you do, please let me know in the comments below. Plus, if you have any woodworking questions, feel free to ask them and I'll see if Lars, Jake or I can answer it.

But, I wanted to wish you all a Happy Holiday weekend! I hope you spend it feasting on good food with friends and family.


Monday, June 7, 2021

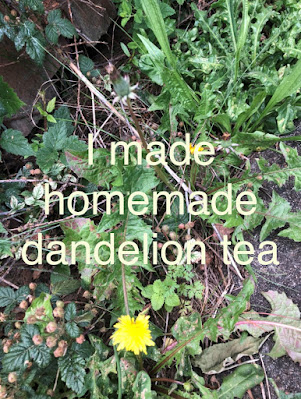
How to Make Homemade Dandelion Tea


Have you ever wondered what Dandelion Tea tastes like? Well, I wanted to find out. So, I made some. It was  easy to do. All I had to do was go out in the yard and gather some dandelions for my tea. 

If you're curious how I made the tea, just watch the clip below.


Thursday, December 3, 2020

Christmas Gnomes Come for a Visit


 I'm sure you've heard of Elves, but what about Nisse, or Gnomes?

Well, if you've never met one of these cheery little guys, here's an easy way to help bring them into your house for the holidays.

It's a simple craft you can do with your kids or grandkids and what could be more fun that creating your own little helpers to have around the house at Christmas?

If you'd like  to see how to make these little fellows, just click on my YouTube link and watch the short little video.

And, if you do make a few of these  little wee folk, please  let me know because I'd love to see what you did with these little people. 

Friday, September 4, 2020

Halloween is Sneaking Up On US


Is anyone else starting to get ready for Halloween? I can hardly wait. When can I start putting out decorations? I don't want to be one of those people who start celebrating a holiday before it's even here but....

I've been working on so many things. I can't wait to share them all so here are a few of my creations and works in progress.

Okay,  my theme this year was inspired by a drawing I made and I'm not an artist but I fell in love with the idea of  dragons:


Then I started thinking about Game of Thrones and Dragon Eggs. So I had to make a few...


It's simple to do. All you need is some styrofoam shaped like an egg and some thumb tacks. I tried to use a variety of tacks to give  the eggs  some dimension.


And I was  super happy with how they came out.

Next, I wanted some dragons. So, lucky for me, my sons both have 3D printing skills and so I didn't have to wait long to have some baby dragons to come creeping out of my eggs.


Of course,  I had to piece them together and paint them.


And the hardest part was picking the colors.


I made one blue and one green (never said I wasn't a Dr. Obvious). Which one do you like the best? I even used a little glitter to add some more magic to the mixture.

And now, I'm just getting going...

If you love Halloween, like me, keep watching for more of my decorations because I'm planning to go all out this year.

Wednesday, June 10, 2020

Homemade Clay Craft - Penguin Project to do with Kids


I wanted to make some little penguins  so I bought some clay and started modeling the little guys.

Here's how to do it.

First buy some clay at your local craft or hobby shop.


Make sure you get the clay you can bake and not the remoldable clay - which doesn't harden and can always be squished back into a pile of clay.

Then make a pear shaped object out of your clay.

After you've made the pear shaped object, cut out some wings and stick them on the sides.

After you have the wings, you need eyes, feet and a beak.

Stick the beak, feet and eyes on to the pear shaped figure. Rub them into the figure at the connections. Then bake the little guy - per  directions on the clay package.

When he is finished baking, add a little paint or you can use markers.

Before you bake him, you can smooth him a bit. I accidently made indentations in his  body with my fingernails.

I think this little guy is cute but I want to practice a bit so I can make a little penguin pond in my garden ;D I think kids  walking past my little "pond" will think it's fun. 


Tuesday, June 9, 2020

Fairy Gardens

I've always wanted a Fairy Garden...so I decided to make one 

Or two...


Here's how I did it:

First I grabbed a broken ceramic pot that my dog knocked off the porch when she ran past it. And I began painting it using a gold acrylic paint. When I was done painting, I started gluing...


I glued some moss and little garden-like embellishments all over the pot. Next I  painted the chipped-off piece yellow. Then I took an old  button and sewed a bead on the  button and glued it to the chipped piece because I thought this would make a perfect doorknob. I glued the "door" back onto the pot using a strong epoxy glue.

Then I used my handy-dandy hot glue gun to make a wreath to hang over the door.


I hung the welcome wreath over the door but I still wasn't finished. 

I also painted some windows on the sides and glued more moss onto the "house". 

I thought it turned out really cute but I'm not finished yet.

I also made a birdcage fairy house to hang on a post.

Now all I have to do is find a nice spot in the garden for these tiny homes. 

Monday, April 13, 2020

Bunny Cake

Easter 2020 Bunny Cake


I've always loved to bake but I've had more than my share of baking fails. In fact, I had a near disaster with this bunny at the very beginning - but more about that in a minute. 

First, I wanted to see if there might be other people out there that like to bake, make and create. If so,  please share links to your blogs in the comments so I can pop over there and see what you're making.

Anyway, I thought I'd share how I made this bunny cake.

First I baked the cakes (3 of them) in 6 inch baking tins. And, right away I had problems. I was trimming one of the tops of the cakes to make them all level and I got distracted because I was boiling eggs at the same time. I was checking on the eggs as I was leveling the cakes and...I trimmed the top off the cake horribly. 

You can see how it broke apart. But I just wedged it back together and used a little butter cream (I've added a link to my butter cream frosting recipe) to "glue" it together. My point is, don't give up because of one set back.


Then I crumb coated the cake in homemade butter cream (which is simply powdered sugar mixed with butter and maybe a tablespoon of milk or cream). I always crumb coat on a silpat so I can easily slip the cake off and onto a cutting board. (Crumb Coating - is simply covering the cake in a thin layer of frosting and then putting it in the fridge to set).


Then I rolled out my fondant on  a little cornstarch - to keep the fondant from sticking to the table. TIP: don't do this on a hot day because cooking is like picnicking. The weather plays a big part in your success. And I've had some fondant fails due to weather.


Then I put the fondant over the crumb-coated cakes and trimmed it around the edge. Adding a ribbon around the bottom makes it looked finished and almost professional.


Then I began decorating.

I used Fondant to make the facial features and "glued" them on using buttercream and  meringue paste. 

The finishing touch was the ears but I had another problem there. I thought I had gum paste but I didn't. So, I took some left over fondant and made ears. I stuck them on bamboo skewers and put the in the freezer to harden up until after dinner. Then I pulled them out off the freezer and stuck them in place. But even then, I'd forgotten about the whiskers until my son pointed it out. Luckily, I had some toothpicks in the kitchen. I sprinkled some jelly bean eggs around the edge and Voila the cake was finished.


The family said the cake tasted good … and I believed them but no one wanted to eat the poor bunny's face. And, probably because the fondant was pretty thick there, just look at the nose and cheeks ;D


So this cake was a fun family dessert that everyone enjoyed - including me ;D I had a piece too but I'm always a little biased so  I like to see what  the family thinks.

But, this wasn't my first bunny cake. Over the years I've made a few other Easter cakes.


These bunny cupcakes are a fun, easy project. This bunny is diving down into the hole. So, he was super simple to make

I was looking back  over the years and I guess I've made more than my share of cakes. If you've made some fun cakes too, please share a link to your blog or send a picture, I'd love to see them.

I hope you all stay well and enjoy some creative days, making, baking and creating :D


Monday, March 23, 2020

5 Kid Friendly Crafts to Keep Busy


Are you going a little stir-crazy?
(WHO ISN'T?)

Well, Easter is only a little over two weeks away, so why not put this time to good use by making some holiday crafts, treats, and tasty dishes to keep the kids and yourself busy? 

(Below are some tried and true crafts/recipes I've done-and their links-so happy crafting)

1)

The prettier the paper – the better
But white paper will work 
Simply color, paint, draw or even paste magazine pictures to beautify your baskets

The stiffer the paper – the stronger
If you have cardstock – all the better

Staple, tape or even glue – use what you have around the house 

2)

These are simply cupcakes with coconut frosting but if you don’t have coconut, simply scoop your frosting into a baggie and cut the end off to pipe “grass” on top. 

If you have questions let me know in the  comments.

3)

If you have food coloring and eggs, you can make your own minions. If you don’t have jiggly eyes, simply draw them with a marker or paint them with food coloring.

4)

If you have rice krispies and marshmallows – you can make easter eggs! If you don’t have marshmallows, you can make your own.


5)

If you have a can of beets and some eggs, you can color eggs the natural way. This is safe (except for the obvious staining issue). Put on an apron, tie a towel around yourself, or simply wear old clothes for this project. 


It couldn't be more simple. Just dunk your egg in the juice - then let it sit - it takes longer than food coloring but it comes out pretty.


I hope you enjoyed these five simple ways to have some fun with things you probably have around the house.

Stay well and happy creating!


Thursday, December 12, 2019

Poop Emoji Cupcakes

Have you ever wanted to make a poop emoji cupcake? Well I have. So, I did. I made these little guys for my brother-in-law's 60th birthday. (He's a plumber - so it seemed sort of appropriate.) I simply baked a couple dozen chocolate cupcakes and then I piped chocolate frosting onto the top using a piping pastry bag, without using a tip. 

At first, I tried using a #10 Wilton tip, but the rings of frosting were too small so I piped them into a bowl and started over. I decided not to use any tip at all so the rings of frosting would be big. And, I think it worked out great.

Then I cut out the mouth and eyes using black and white fondant. I used piping tips to get the circles. And I cut the largest circle in half to make  the mouth. 

I filmed it all using a time-lapse setting so it wouldn't be too boring.

I also printed out these little signs and taped them onto cupcake sticks and stabbed them into the cakes. 

Let me  know what you think. And, if you try this, please share some pictures with me. I'd love to see them.

Thursday, October 18, 2018

Making, Baking and Creating

I love to bake and when one of my kids' birthdays rolls around, I'm all about baking,  making and creating. It's not to say that I'm great at it but I love to do it. So, whenever there's a birthday, you can find me in the kitchen trying to make something sweet for one of my kids, my husband, or a friend ;D

I think baking is easy. All I do is run to the cupboard--like Old Mother Hubbard--but instead of bones, I pull out cake pans and I don't always know what I'm going to make in the beginning but once I get going, something pops in my head.

It's easy to do. All I do is stack layers and cut and shape or simply decorate until I have what I want.

And, I have a BIG family so this fall I made more than a few cakes.

Here's how I did it.

I started with a couple layers of cake (this one was two pineapple upside down cakes that I stacked  together) because my son loves Pineapple... then I covered them with fondant.


And started to decorate.

I was only thinking of pineapple...so this is where I began. But then I had  to add a little bit more.

But Luke's birthday is in October and this didn't seem very Halloweenie . . . and I was thinking of scary eyes...so on the backside I added a couple of Oreo eyes

But that still didn't seem like enough...so I baked a couple more small little cakes...just in case
And I stacked those together to make pumpkins. Then I frosted them with some orange cream cheese frosting.

And to top it off, I used a PayDay Candy Bar as the stem. I guess I shouldn't have added the fondant leave because my husband said that made the cake look like an orange apple. Oh well, I never said I was  great.

And then we sang and ate and ate...oh, but first,  Luke had to blow out his candles.

I think this photo makes him look like he's breathing fire... and that  inspires  me  to make a  dragon cake...next time, I think.

Anyway,  I'd  love to hear about the cakes  you make,  bake  or create. 


Friday, October 12, 2018

GHOST GIRL - How to Make One "Appear"


I’m still working on my Halloween decorations. I'm trying to create a Spooktacular Shoctober.
I have my Ghost Girl haunting the front lawn.  But this wasn't enough so I had to do a little bit more.


She’s made out of chicken wire to make the shape of her dress. Then we draped cheesecloth over the frame. I’m still working on her. I’m thinking of making arms and a head from chicken wire and draping more cheesecloth over the frame to create the illusion of a woman in white floating through the yard.

Any other Halloween lovers out there? What do you think? Any ideas on what else I could do to make the Ghost Girl “appear” ?